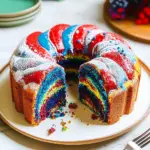
When you think of a cake that embodies celebration and joy, the Red White & Blue Marble Cake springs to mind like confetti at a parade. Picture this: a moist, fluffy cake swirled with vibrant red and blue batters, each bite bursting with sweet vanilla flavor. The aroma wafts through your kitchen like an invitation to a summer gathering, promising delightful moments around the table. For more inspiration, check out this explore more desserts recipe.
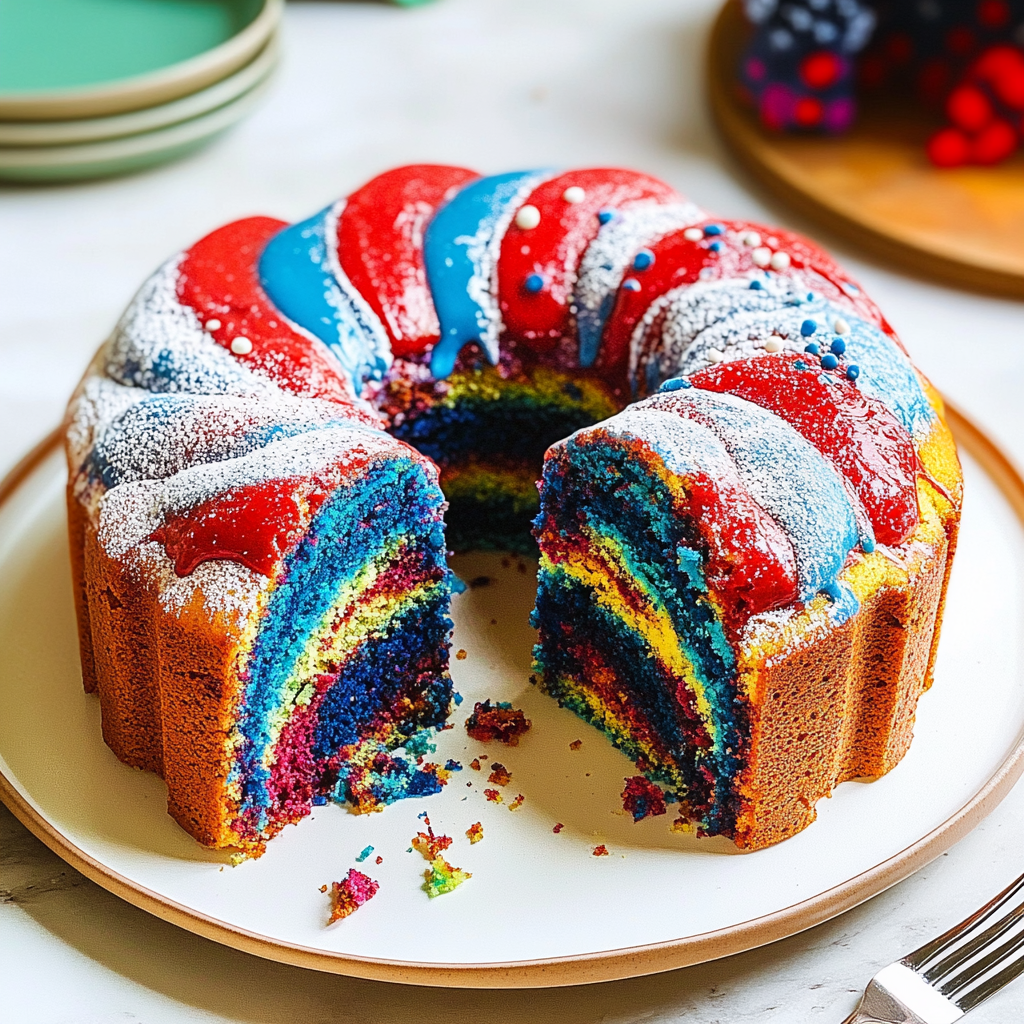
This cake is not just a treat; it’s a memory-maker. Whether you’re celebrating Independence Day or simply enjoying a sunny afternoon, each slice transports you to festive occasions filled with laughter and joy. Get ready for an unforgettable flavor experience that will have your friends asking for seconds.
Why You'll Love This Recipe
- This Red White & Blue Marble Cake is simple to prepare, making it perfect for bakers of all levels
- Its colorful layers create stunning visual appeal for any occasion
- Each slice offers a delightful mix of textures that keep the taste buds dancing
- It’s versatile enough to be served at picnics, birthday parties, or just because!
I still remember the first time I made this cake for my family reunion—everyone’s faces lit up in pure delight as they dug into those colorful layers.
Essential Ingredients
Here’s what you’ll need to make this delicious dish:
All-Purpose Flour: This forms the base of your cake; make sure it’s fresh for best results.
Sugar: Granulated sugar sweetens the batter perfectly; avoid using brown sugar to maintain color.
Baking Powder: This is essential for the cake’s rise; always check expiration dates for effectiveness.
Salt: Just a pinch enhances flavors; don’t skip it!
Unsalted Butter: Use room temperature butter for easy mixing and better texture.
Eggs: These provide moisture and structure; use large eggs at room temperature.
Milk: Whole milk adds richness; you can substitute with buttermilk if you want extra fluffiness.
Red and Blue Food Coloring: Gel colors work best for vibrant hues without altering batter consistency.
Vanilla Extract: Pure vanilla extract elevates the flavor; avoid imitation for the best taste.
The full ingredients list, including measurements, is provided in the recipe card directly below.
How to Make Red White & Blue Marble Cake
Prepare Your Oven and Pans: Preheat your oven to 350°F (175°C). Grease and flour two 9-inch round cake pans to prevent sticking.
Mix Dry Ingredients: In a large bowl, whisk together flour, baking powder, and salt until well-combined. This step ensures an even rise throughout your cake.
Cream Butter and Sugar: In another bowl, beat the butter and sugar together until light and fluffy—about 3-5 minutes should do it. This adds airiness to your batter.
Add Eggs and Vanilla: Incorporate eggs one at a time into the creamed mixture, followed by vanilla extract. Mix until perfectly smooth—this is where magic happens!
Combine Wet and Dry Ingredients: Gradually add in dry ingredients alternating with milk until everything is just combined. Do not overmix—keep it gentle!
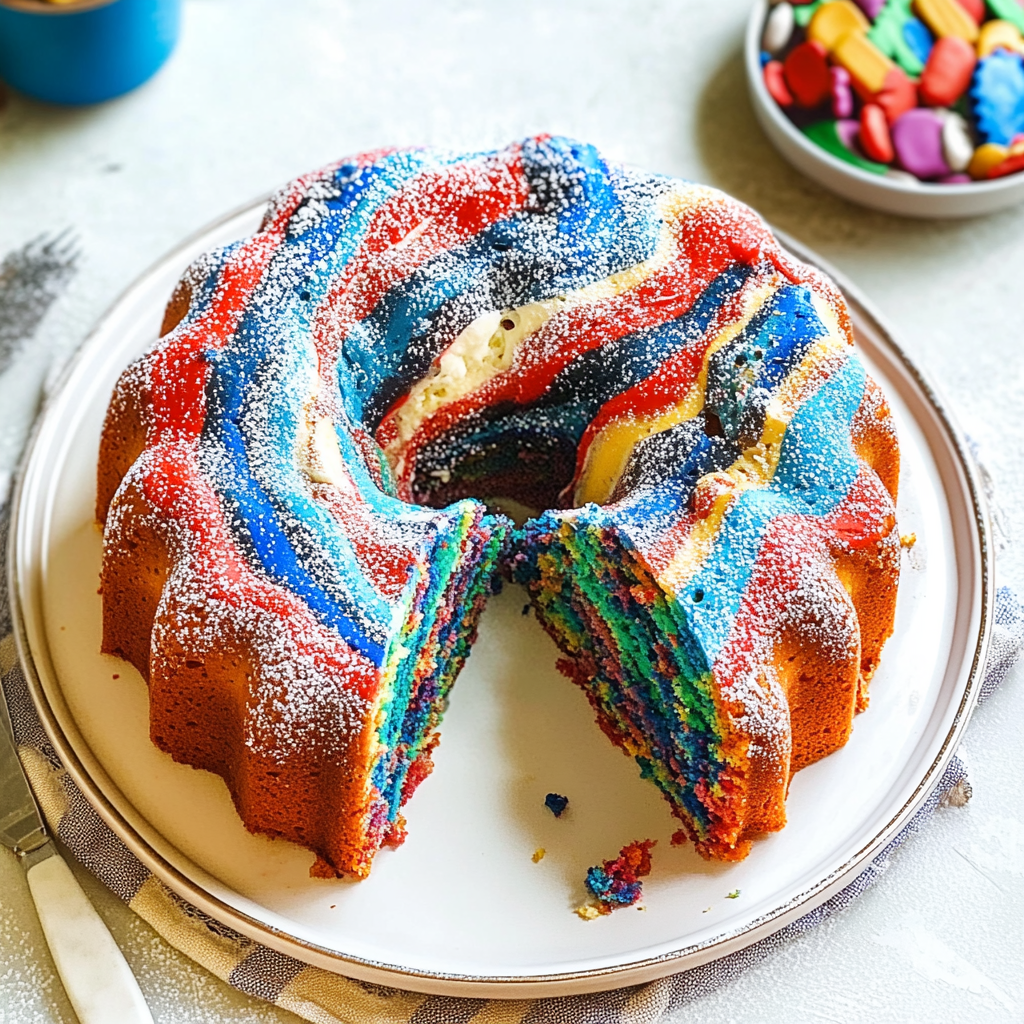
Create Your Colorful Swirls: Divide the batter into three bowls: leave one white, tint one red with food coloring, and another blue. Gently fold each color separately to maintain their vibrancy.
Layer Your Batter: Pour dollops of each colored batter into prepared pans randomly. Use a skewer or knife to swirl gently—too much swirling turns it into tie-dye instead of marble!
Bake Your Cake: Place both pans in the oven on the middle rack. Bake for 25-30 minutes or until a toothpick inserted comes out clean. The aroma will be irresistible!
Let cool in pans for about 10 minutes before transferring them onto wire racks completely cool before frosting.
Now grab your favorite frosting recipe or store-bought option because this masterpiece deserves an equally fabulous topping!
You Must Know
- The Red White & Blue Marble Cake is a festive delight, perfect for celebrations
- Its vibrant colors and delicious flavors make it a showstopper
- Ensure you have all ingredients at room temperature for a smooth batter and even baking results
Perfecting the Cooking Process
Start by preheating your oven to 350°F (175°C). Prepare your cake pans with baking spray or parchment paper, then mix your batter. Pour in layers for that stunning marbled effect, and bake until golden brown and a toothpick comes out clean.
Add Your Touch
Feel free to switch up the flavors! Try almond extract instead of vanilla or add lemon zest for a citrus twist. You can also swap the food coloring for other shades to match any occasion, like green for St. Patrick’s Day.
Storing & Reheating
Store leftover cake in an airtight container at room temperature for up to three days. For longer storage, refrigerate it wrapped tightly in plastic wrap. Reheat individual slices in the microwave for about 10-15 seconds or enjoy them cold!
Chef's Helpful Tips
- Achieving the perfect marble effect requires careful swirling; don’t overdo it!
- Use room temperature ingredients for better mixing, and allow the cake to cool completely before frosting to avoid melting
- A simple glaze can elevate flavors without overwhelming sweetness
The first time I made the Red White & Blue Marble Cake, my friends dubbed me “The Cake Wizard.” Their delighted faces as they sliced into the colorful layers made all those hours worth it.
FAQ
What is the best way to achieve a marbled effect?
Pour alternating colors of batter into the pan and swirl gently with a knife.
Can I use different colors for different occasions?
Absolutely! Customize with any food coloring to match your theme or holiday.
How do I prevent my cake from sticking?
Use parchment paper or grease your pans well before pouring in the batter.
Red White & Blue Marble Cake
Red White & Blue Marble Cake is a festive dessert that captures the spirit of celebration with its vibrant colors and delightful flavors. This moist, fluffy cake swirls rich red and blue batters, creating a visually stunning centerpiece for any occasion. Perfect for summer gatherings or holiday festivities, each slice offers a sweet vanilla taste that will leave everyone wanting more. Whether you’re celebrating Independence Day or hosting a birthday party, this cake is sure to bring joy and smiles to your table.
- Prep Time: 20 minutes
- Cook Time: 30 minutes
- Total Time: 50 minutes
- Yield: Serves approximately 12 slices 1x
- Category: Dessert
- Method: Baking
- Cuisine: American
Ingredients
- 2 ½ cups all-purpose flour
- 1 ½ cups granulated sugar
- 1 tbsp baking powder
- ½ tsp salt
- ¾ cup unsalted butter (room temperature)
- 4 large eggs (room temperature)
- 1 cup whole milk (or buttermilk)
- Red and blue gel food coloring
- 2 tsp pure vanilla extract
Instructions
- Preheat your oven to 350°F (175°C). Grease and flour two 9-inch round cake pans.
- In a bowl, whisk together flour, baking powder, and salt.
- In another bowl, cream butter and sugar until light and fluffy (3-5 minutes).
- Add eggs one at a time, mixing in vanilla extract until smooth.
- Gradually mix in dry ingredients alternating with milk until just combined.
- Divide batter into three bowls: leave one white, tint one red, and one blue.
- Pour alternating dollops of colored batter into prepared pans; swirl gently with a knife.
- Bake for 25-30 minutes or until a toothpick comes out clean. Cool in pans for 10 minutes before transferring to wire racks.
Nutrition
- Serving Size: 1 serving
- Calories: 355
- Sugar: 26g
- Sodium: 170mg
- Fat: 14g
- Saturated Fat: 8g
- Unsaturated Fat: 4g
- Trans Fat: 0g
- Carbohydrates: 53g
- Fiber: <1g
- Protein: 4g
- Cholesterol: 78mg
Keywords: For a unique twist, use almond extract instead of vanilla or add lemon zest for citrus notes. Customize colors with food dye to match any theme.

