The oven’s buzzing, and I’m already eyeing the golden triangles of corn tortillas. Chilaquiles Verdes are on the menu tonight, and if they don’t get eaten straight from the pan, I’ll call it a win.
This dish is perfect for nights when you need something fast but still crave that restaurant feel (trust me, it hits just right). With only 10 minutes in the oven for those chips to crisp up, you can whip this up with barely any effort. It’s all about flavor and crunch without the fuss. Just pure goodness.
Why You’ll Love This Chilaquiles Verdes
- Super Easy: Just bake some tortillas and toss them in salsa—dinner’s ready in about 15 minutes!
- Flavor Packed: The combo of spicy green salsa and fresh toppings creates a bold flavor explosion you won’t forget.
- Crispy Goodness: You’ll get that perfect crunch from the tortilla chips, which contrasts beautifully with the creamy avocado and cheese.
- Totally Versatile: It’s great for breakfast, lunch, or dinner—add whatever extras you have on hand to make it your own.
- Watch the Heat: If you’re not careful, it can get a bit soggy if left too long in the salsa, so serve right away!
Chilaquiles Verdes Ingredients
For the Base:
corn tortillas (6 corn tortillas) — Fry ’em until crispy or they’ll just get soggy in the sauce.
green salsa (2 cups) — Use a good quality salsa verde like Herdez; don’t skimp on flavor.
For the Topping:
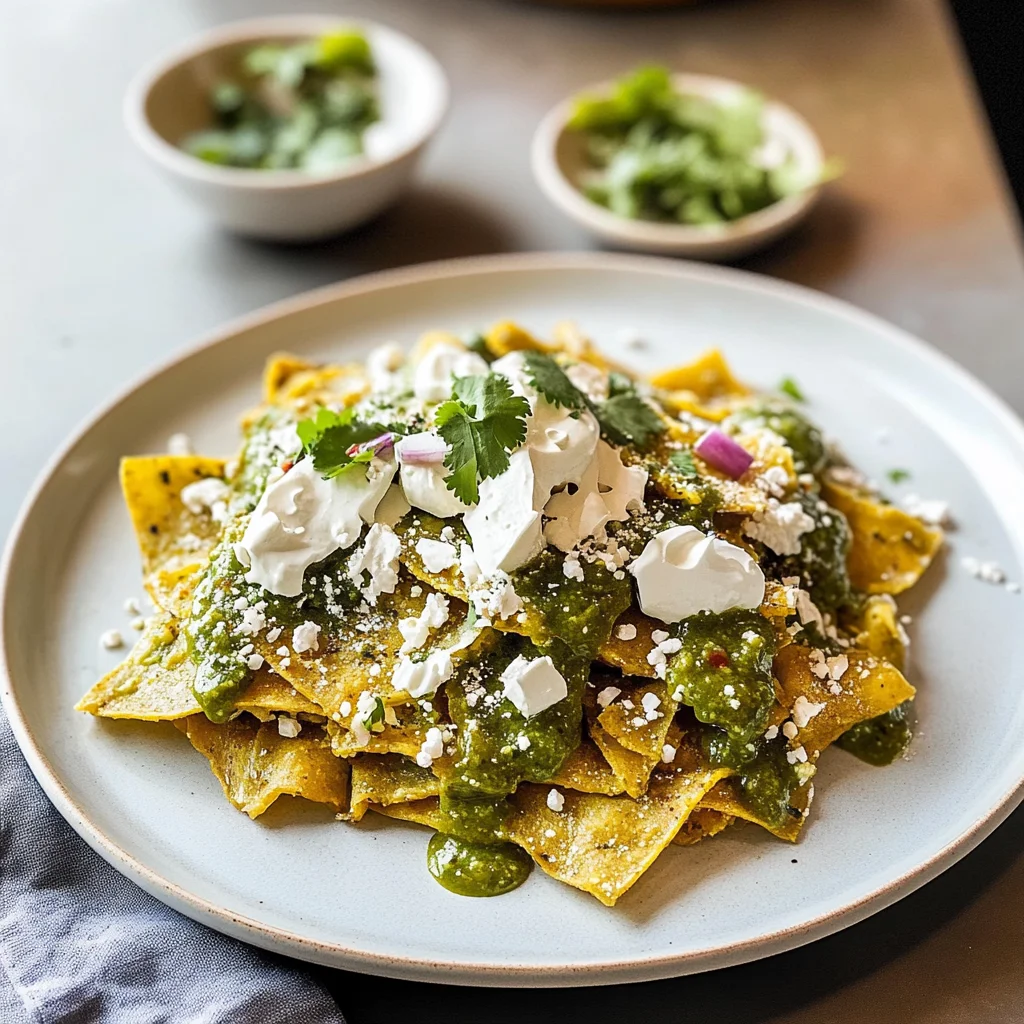
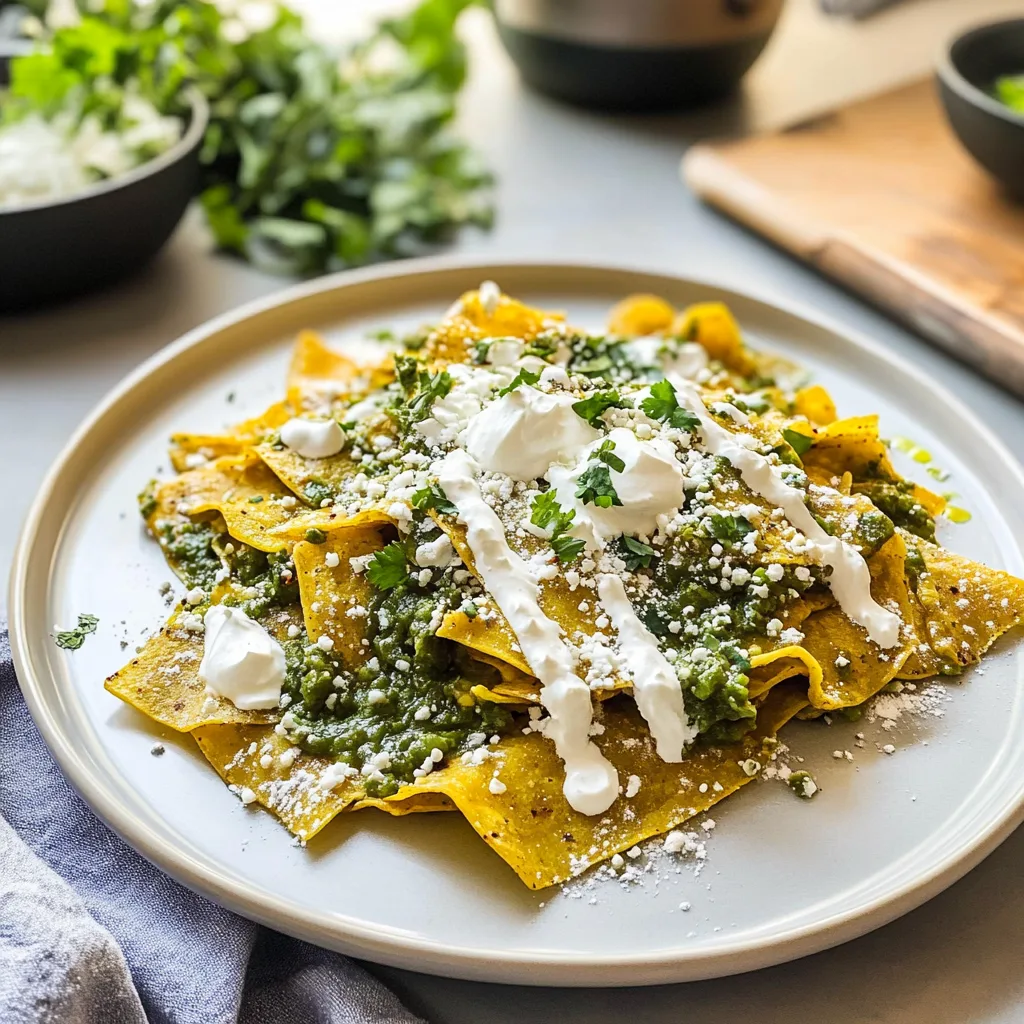
fresh cheese (1 cup) — Use queso fresco, it’s the real deal – don’t swap it for mozzarella.
avocado (1 avocado) — Grab a ripe one or it won’t mash right for that creamy layer.
sour cream (1/4 cup) — Full-fat sour cream is a must; low-fat won’t give you that richness.
red onion (1/4 cup) — Slice it thin or you’ll overpower everything with raw onion bites.
cilantro (1/4 cup) — Chop it fresh, dried cilantro’s just sad and won’t cut it here.
eggs (2 large) — Fry ’em sunny-side up for that runny yolk; hard-boiled’s a no-go.
Full measurements in the recipe card below.
How to Make Chilaquiles Verdes
1. Prep the Tortillas: Cut the corn tortillas into triangles and spread them out on a baking sheet. Bake in a preheated oven at 375°F (190°C) for about 10 minutes until they’re golden and crispy.
2. For the Sauce: In a large skillet, heat the green salsa over medium heat until it starts to simmer — you’ll see tiny bubbles forming around the edges.
3. Add Tortilla Chips: And when that salsa’s bubbling, add those crispy tortilla chips to the skillet. Gently toss to coat them in the sauce, cooking for another 2-3 minutes until everything’s warmed through.
4. Serve It Up: Transfer your Chilaquiles Verdes to serving plates, making sure each plate gets a good amount of saucy chips.
5. Top ‘Em Off: Now, sprinkle crumbled fresh cheese on top, add sliced avocado, drizzle with sour cream, and finish with chopped red onion and cilantro (a feast for the eyes!).
6. Optional Eggs: If you’re feeling fancy, fry or poach two eggs sunny-side up and place one on each serving right before serving — that runny yolk is everything!
7. Watch Out!: Don’t walk away from those tortilla chips while they bake; they can go from golden to burnt in about 30 seconds if you’re not careful.
Exact quantities in the recipe card below.
How to Store Chilaquiles Verdes
- Room Temperature: Don’t leave it out for more than 2 hours. I know it’s tempting, but you don’t want to risk any food safety issues.
- Refrigerator: Store leftovers in an airtight container for up to 3 days. Just keep in mind that the crispy topping softens in the fridge — that crunch won’t be quite the same when you reheat it.
- Freezer: You can freeze the salsa-coated tortilla chips for up to 1 month, but honestly, they won’t hold up well after thawing. It’s better to freeze the salsa separately and make fresh chips later.
- Reheating: Heat in a skillet over medium heat until everything’s warmed through and you can hear a little sizzle (about 5 minutes). If you want some of that original crunch back, consider reheating uncovered!
What to Serve with Chilaquiles Verdes?
This dish is rich and savory, so having something bright and refreshing on the side balances it perfectly. Here are some ideas that really complement those flavors:
- Fresh Fruit Salad: The cool, juicy fruit adds a refreshing temperature contrast that keeps every bite lively.
- Pickled Red Onions: Their tangy acidity cuts through the richness of the salsa, giving your taste buds a zing.
- Grilled Corn on the Cob: The sweet, charred kernels provide a nice texture difference and a pop of color.
- Sliced Radishes: They add crunch and a peppery bite; just slice them thinly for easy prep.
- Lime Wedges: A squeeze of fresh lime juice brightens up each bite with its zesty acidity—definitely don’t skip these!
- Black Beans: For added protein and heartiness, heat canned black beans on the stove for about 5 minutes.
- Crispy Fried Plantains: Their sweetness contrasts well with this dish’s savory notes; fry them up in just 10 minutes for an easy side.
Each of these options brings something different to the table, keeping your meal exciting!
Chilaquiles Verdes Variations
Here’s how to play with this recipe and make it your own!
- Crispy Tortilla Base: Fry the tortilla triangles in oil instead of baking for extra crunch.
- Spicy Kick: Add 1/2 teaspoon cayenne pepper to the salsa while heating for a fiery twist.
- Cheese Swap: Use feta cheese instead of queso fresco if you can’t find fresh cheese (it works surprisingly well).
- Egg Upgrade: Top with a poached egg for that runny yolk goodness — so good!
- Herb Boost: Mix in 1/4 cup chopped jalapeños with the onions for an herbaceous punch.
- Creamy Dream: Drizzle 1/4 cup avocado crema instead of sour cream for a creamy, zesty layer.
- Savory Addition: Toss in some sautéed chorizo when adding the tortilla chips for a next-level upgrade!
Make Ahead Options for Chilaquiles Verdes
I usually prep the tortilla triangles and salsa a day in advance. Just bake the tortillas, let them cool, and store them in an airtight container. The green salsa keeps well in the fridge for about three days in a glass jar. But honestly, I wouldn’t recommend making the toppings ahead of time — the avocado and fresh cheese are best when they’re freshly added so they don’t get funky. Right before serving, I heat up the salsa, toss in the chips, and top everything off. It’s quick and easy! Just remember: fresh is key for those toppings.
Chilaquiles Verdes Recipe FAQs
Can I make Chilaquiles Verdes ahead of time?
You can prep the components separately, but I wouldn’t assemble them too far in advance. The tortilla chips get soggy if they sit in the salsa for too long. Bake those triangles and store them in an airtight container until you’re ready to toss ’em with the green salsa. Just remember, serve right after mixing for that perfect crisp-tender texture!
What can I substitute for fresh cheese in this dish?
I strongly recommend sticking with queso fresco; it’s what gives this recipe that authentic flavor. If you really can’t find it, crumbled feta is a decent stand-in, but skip mozzarella—it doesn’t have the same tanginess or texture. And trust me, fresh cheese brings everything together perfectly!
Why did my Chilaquiles Verdes turn out soggy?
Soggy chilaquiles usually mean the tortilla chips weren’t crispy enough before adding them to the salsa (like, burnt edges are better than soggy!). Make sure to bake those triangles until they’re golden and crunchy—about 10 minutes should do it. And don’t walk away from the oven! You’ll smell when they’re just right.
How can I make this recipe spicier?
If you want a kick, try using a spicier green salsa or add sliced jalapeños on top before serving. You could also sprinkle some crushed red pepper flakes into your sauce while it’s heating up. Just keep in mind that everyone has different heat tolerances, so taste as you go!
Final Thoughts on Chilaquiles Verdes
Chilaquiles Verdes are all about that flavor payoff — the crispy tortillas soak up the zesty salsa and get topped with fresh ingredients that just sing together. Seriously, if you’re looking for a dish that comes together quickly but feels special, this is it. And let’s be real, who doesn’t love a runny yolk dripping over everything? If you’ve been putting this off, tonight’s the night. Let me know how yours turned out in the comments!