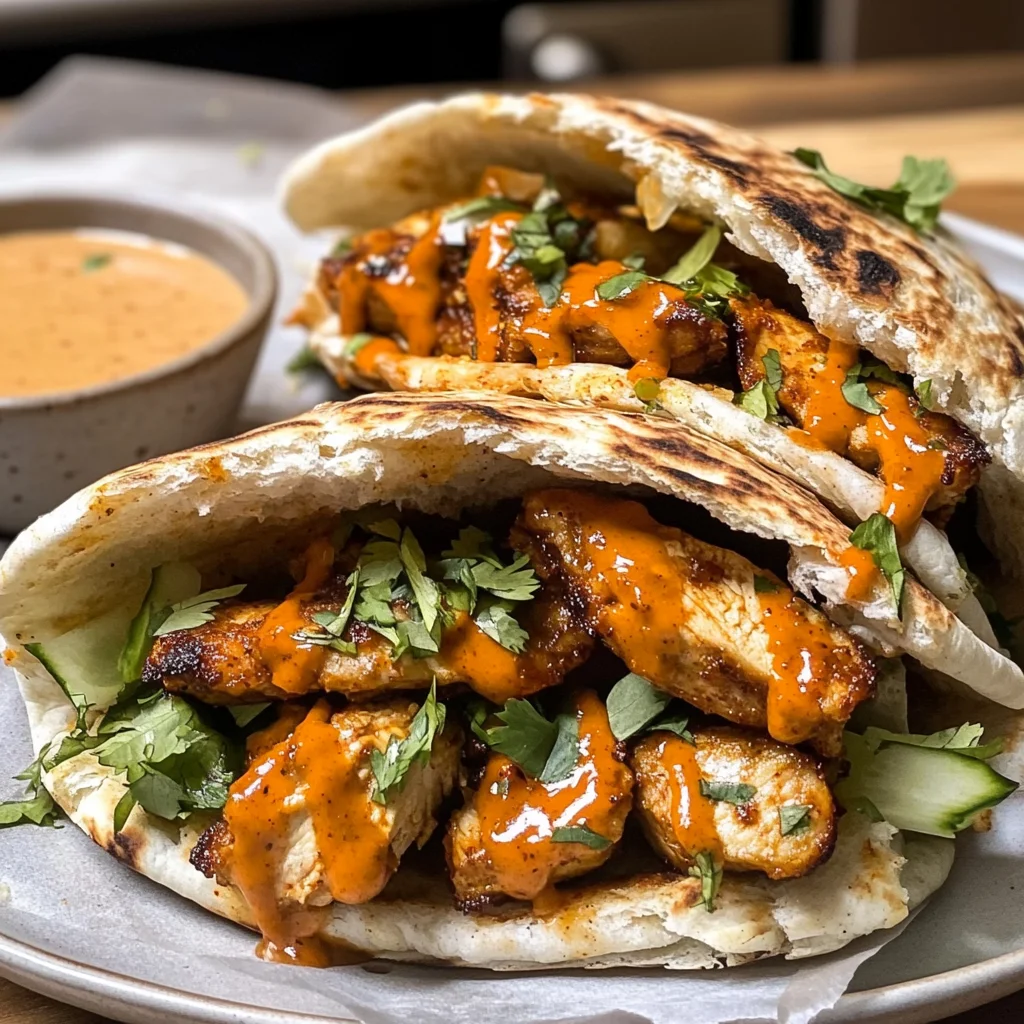
Twenty minutes in the oven and dinner’s almost ready. You can hear the chicken sizzling with spices, and I swear, the aroma is pulling everyone into the kitchen. These Baked Chili Chicken Pita Pockets are a game-changer for those nights when you’re scrambling for something tasty but don’t have a lot of time (or energy) to spend on prep.
This dish is perfect for weeknights when you’ve got zero plans and a family that’s already hangry. Plus, using cubed chicken means it cooks faster than whole breasts—definitely a win. Dinner’s about to get way easier!
Why You’ll Love This Baked Chili Chicken Pita Pockets
- Super Easy Prep: Just toss everything together, bake for 20 minutes, and you’ve got dinner ready to go.
- Bold Flavor Combo: The chili powder and cumin give it a spicy kick that really makes the chicken pop.
- Crisp-Tender Veggies: With fresh lettuce and juicy tomatoes, the texture is a fun mix of soft and crunchy.
- Meal Flexibility: You can swap in different veggies or even use leftover chicken if you’re short on time (just don’t forget to adjust seasoning).
- Kid-Friendly Option: It’s a hit with picky eaters! But, if your kids are super sensitive to spice, go light on the chili powder.
Baked Chili Chicken Pita Pockets Ingredients
For the Chicken Filling:
chicken breast (1 pound) — Use fresh, boneless chicken breast; frozen won’t cook evenly and gets rubbery.
red bell pepper (1 cup) — Roast red bell peppers for extra sweetness; skip it and you’re missing flavor.
onion (1 cup) — Don’t skimp on browning the onion; raw taste will ruin the whole dish.
chili powder (2 tablespoons) — Stick to McCormick chili powder; other brands can be too weak or too spicy.
cumin (1 teaspoon) — Use ground cumin, not whole seeds; whole won’t dissolve and taste harsh.
salt (1 teaspoon) — Don’t go light on salt; it’s essential or your chicken ends up bland.
black pepper (1 teaspoon) — Fresh cracked black pepper’s a must; pre-ground loses flavor and punch.
For the Pita Pockets:
pita bread (4 whole) — Use whole wheat pita for texture; white ones get soggy and fall apart.
shredded lettuce (1 cup) — Add shredded romaine, not iceberg; iceberg’s just water and lacks crunch.
cherry tomatoes (1 cup) — Cherry tomatoes burst with sweetness; skip ‘em and your filling’s too dry.
sour cream (1 cup) — Use full-fat sour cream; low-fat won’t give you that creamy richness you need.
Full measurements in the recipe card below.
How to Make Baked Chili Chicken Pita Pockets
1. Preheat Oven: Preheat your oven to 375°F (190°C). This is key for getting that crispy edge on the chicken filling.
2. Mix Chicken Filling: In a large bowl, combine the cubed chicken, red bell pepper, onion, chili powder, cumin, salt, and black pepper. Mix well to coat everything evenly.
3. Spread Chicken: For the baking: Spread the chicken mixture onto a baking sheet lined with parchment paper. Bake it in the preheated oven for 20-25 minutes, until you see no pink left in the chicken.
4. Cool Chicken: Once the chicken’s done baking and looks golden-edged, remove it from the oven and let it cool slightly (don’t skip this step — if you rush it, you’ll burn your fingers stuffing those pitas).
5. Prepare Pita Pockets: Now cut each pita bread in half to create pockets. I prefer whole wheat pita for texture; they hold up better than white ones.
6. Stuff Pitas: Stuff each pocket with that delicious baked chicken mixture along with shredded lettuce and halved cherry tomatoes.
7. Serve Up: Serve your Baked Chili Chicken Pita Pockets warm with a dollop of full-fat sour cream on the side (trust me, you need that creaminess).
Exact quantities in the recipe card below.
How to Store Baked Chili Chicken Pita Pockets
- Room Temperature: These are best eaten fresh, but if you need to keep them out for a bit, cover with a clean kitchen towel. They’ll stay good for about 2 hours before they start to dry out.
- Refrigerator: Pop any leftovers in an airtight container (or wrap ’em in foil) and they’ll last about 3 days. Just know that the pita might get a little chewy, so don’t expect the same fresh texture.
- Freezer: You can freeze them if you want! Wrap each pocket tightly in plastic wrap and then pop them in a freezer-safe bag. They should be fine for about 2 months. Just remember — the filling freezes well, but the pita can become a bit dense.
- Reheating: For best results, reheat in the oven at 350°F (175°C) for about 10 minutes, until they’re warmed through and you hear that nice sizzle when you take ’em out (that’s the sound of goodness!). If you’re in a hurry, microwave on high for about 1-2 minutes; just know that the pita won’t have that same crispiness as when freshly baked.
What to Serve with Baked Chili Chicken Pita Pockets?
It’s a filling meal, so adding some lighter sides helps balance everything out and keeps it from feeling too heavy.
- Greek Yogurt Dip: A cool, creamy dip that adds tanginess to offset the spicy chicken. Just mix yogurt with garlic and herbs.
- Crisp Cucumber Salad: Fresh, crunchy cucumbers tossed with a little vinegar create a refreshing bite that cuts through the richness.
- Roasted Vegetable Medley: Roasting veggies like zucchini and carrots brings out sweetness and adds a warm texture contrast. Takes about 25 minutes.
- Zesty Coleslaw: The crunch and acidity of cabbage slaw brighten up each bite. Just shred cabbage, add carrots, and dress lightly.
- Avocado Salsa: Creamy avocado mixed with lime juice offers a smooth texture that balances the spice. Takes only 10 minutes to prepare!
- Sweet Potato Fries: Their crispy exterior and sweet flavor provide a great texture contrast. Bake for around 20 minutes until golden.
- Spicy Pickles: These add an extra punch of flavor and acidity that cuts through the richness beautifully—trust me on this one!
Baked Chili Chicken Pita Pockets Variations
Here’s how to play with this recipe to suit your taste!
- Spicy Kick: Add 1-2 teaspoons of cayenne pepper with the other spices for a fiery punch.
- Creamy Upgrade: Mix in ½ cup of cream cheese after baking the chicken for a melty-gooey texture.
- Veggie Boost: Toss in 1 cup of diced zucchini or mushrooms with the chicken mixture for extra veggies.
- Herb Infusion: Sprinkle in 1 tablespoon of fresh cilantro or parsley after baking for a fresh pop.
- Cheesy Goodness: Top each stuffed pocket with shredded cheese and return to the oven until bubbly (about 5 minutes).
- Skip the Chicken: Substitute chicken with 1 pound of cubed tofu at the same step for a vegetarian option.
- Crunchy Topping: Add crushed tortilla chips on top right before serving for an extra crunch!
Make Ahead Options for Baked Chili Chicken Pita Pockets
I like to prep the chicken filling ahead of time; it stores well in the fridge for up to 3 days. Just toss it in an airtight container, and you’re set! I usually bake the chicken mixture on Sunday so it’s ready for busy weeknights. The pita pockets, though, are best filled right before serving; they can get a bit soggy if they sit too long. I recommend slicing them just before you’re ready to eat. And don’t forget the lettuce and cherry tomatoes—they’ll stay fresh in a separate container for about 2 days. Plan ahead and enjoy!
Baked Chili Chicken Pita Pockets Recipe FAQs
Can I make Baked Chili Chicken Pita Pockets ahead of time?
You totally can! Just prepare the chicken filling and store it in an airtight container in the fridge for up to two days. When you’re ready, pop it in the oven to reheat. Just make sure it’s heated through and no longer pink (the smell will be amazing!). I wouldn’t stuff the pitas until you’re ready to serve, though; soggy pita isn’t fun!
What can I substitute for the red bell pepper in this recipe?
If you’re not a fan of red bell pepper, try using roasted poblano or even diced zucchini. Both will add their own unique flavors but still keep that veggie crunch. Just remember, roasting those peppers really amps up sweetness, so if you skip it, your filling might lack some depth (trust me on this!).
Why did my Baked Chili Chicken Pita Pockets turn out dry?
Dry chicken usually means it was overcooked. You want that chicken filling to be juicy and tender — look for golden edges and no pink inside when baking. If you used pre-ground spices or skipped the salt, that could also contribute to blandness. Always check your seasoning; don’t hold back on flavor!
Can I use low-fat sour cream for this dish?
DO NOT use low-fat sour cream here! Full-fat is key for that rich creaminess you need to balance out the spice from the chili powder. Trust me, low-fat just won’t cut it in terms of flavor and texture. Plus, a dollop of that creamy goodness really ties everything together!
Final Thoughts on Baked Chili Chicken Pita Pockets
These Baked Chili Chicken Pita Pockets are all about the flavor payoff, thanks to that savory chicken filling bursting with spice and sweetness from the roasted red peppers. Seriously, the combination of fresh ingredients really makes a difference! If you’ve been putting this off, tonight’s the night. They come together in no time and make for a satisfying dinner that feels special without a ton of effort. Let me know how yours turned out in the comments.
Baked Chili Chicken Pita Pockets
Ingredients
Method
- Preheat your oven to 375°F (190°C).
- In a large bowl, combine the cubed chicken, red bell pepper, onion, chili powder, cumin, salt, and black pepper. Mix well to coat the chicken evenly.
- Spread the chicken mixture onto a baking sheet lined with parchment paper.
- Bake in the preheated oven for 20-25 minutes, or until the chicken is cooked through and no longer pink.
- Once the chicken is done, remove it from the oven and let it cool slightly.
- Cut the pita breads in half to create pockets.
- Stuff each pita pocket with the baked chicken mixture, shredded lettuce, and cherry tomatoes.
- Serve the pita pockets warm with a dollop of sour cream on the side.
- Enjoy your delicious baked chili chicken pita pockets!